
I smiled when I saw the definition of the word “toy” at dictionary.com. According to it, toys are supposed to serve as a diversion rather than practicality. It is also an object that typically represents something familiar for children or others to play with. As a children’s teacher I can vouch for that meaning. Sometimes, we use toys to divert the kids’ attention while we prepare for the class. I am sure some moms use toys as a distraction for them to do chores too!
If toys are so helpful and pervasive, are there cheaper alternatives? Fortunately, there are. You can use your imagination and creativity to make handmade toys. Not only can you save more money but you can also increase the toys’ safety.
Two types of toys are mainly in the market today namely: educational toys and entertaining toys. Let us start with the latter…
FUN TOYS
1. MADE OF MILK CARTON
It is vital for kids to consume more milk in order for their bones to grow stronger. And, after they finished the whole carton, do not throw it just yet. You can transform an empty milk carton into a sailboat that can survive sizable splashes of water.
Full instructions – here.
2. MADE OF SPONGES
Have you ever played Jenga or Tumbling Towers? It is a fun game that you and your little ones can get addicted to. But, a new box can cost over S$19. Save more money while retaining its structure by making block pieces out of sponges.
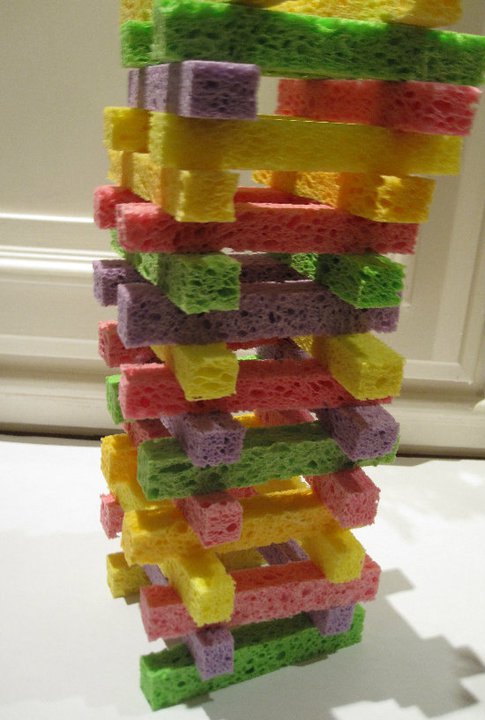
Image Credits: facebook.com/pages/Toddler-Approved/179029702145360?fref=photo
Alternatively, you can practice making patterns or letters out of it. Full instructions – here.
3. MADE OF SHOEBOX
Have you saved up old newspapers, shoeboxes, and rubber bands? Well, you can turn those things into an old-fashioned toy guitar. Browse here for full instructions.
SMART TOYS
1. IMPROVE THE CHILD’S TOUCHING SENSATIONS
Various childcare and preschool centers include sensory tables to improve the fine motor skills and touching sensations of the young minds. Make your own by taking a simple wooden base out of a plastic bin. Then, you can fill it with colorful beads, dried beans, handful of rice, and so much more. This set toy will keep your child occupied for hours!
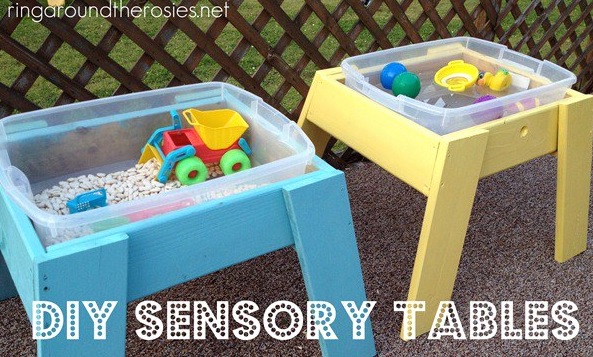
Image Credits: https://www.facebook.com/RingAroundtheRosies
Full instructions – here.
2. IMPROVE THE CHILD’S VISUO-SPATIAL AND PROBLEM SOLVING SKILLS
Say the weather is not friendly enough to go to the nearby playground, what you can do is to round-up your kids, take a large sheet of paper, and several shaped blocks. Then, challenge them into a giant block puzzle. Let them figure it out on their own. Full instructions – here.
3. IMPROVE THE CHILD’S PHONETICS
A toy made out of inexpensive materials can go a long way in terms of improving your child’s language abilities. Repeat the letters and add sounds as you read along the alphabet board (full instructions – here).
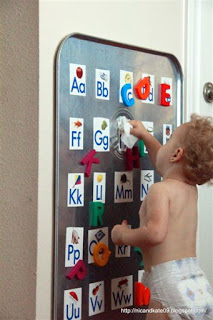
Image Credits: nicandkate09.blogspot.com
Also, you can incorporate magnetic letters for your child to match it with the alphabet board accordingly. This activity is both educational and enjoyable! 🙂
Reminder: Although the ingredients and materials used are safe, it is still essential to look after your child from time to time to avoid any unforeseen events.